Creating a New Order
Creating an order in SampleHQ follows a 4-step wizard: Samples, Customer Details, Cover Letter, and Review.
Step 1: Samples
Start by adding samples from your library to the cart. You can browse all samples, reorder from a previous order, or add a sample kit. Adjust quantities for each item. You can also add collateral items alongside samples using the Browse Collateral button.
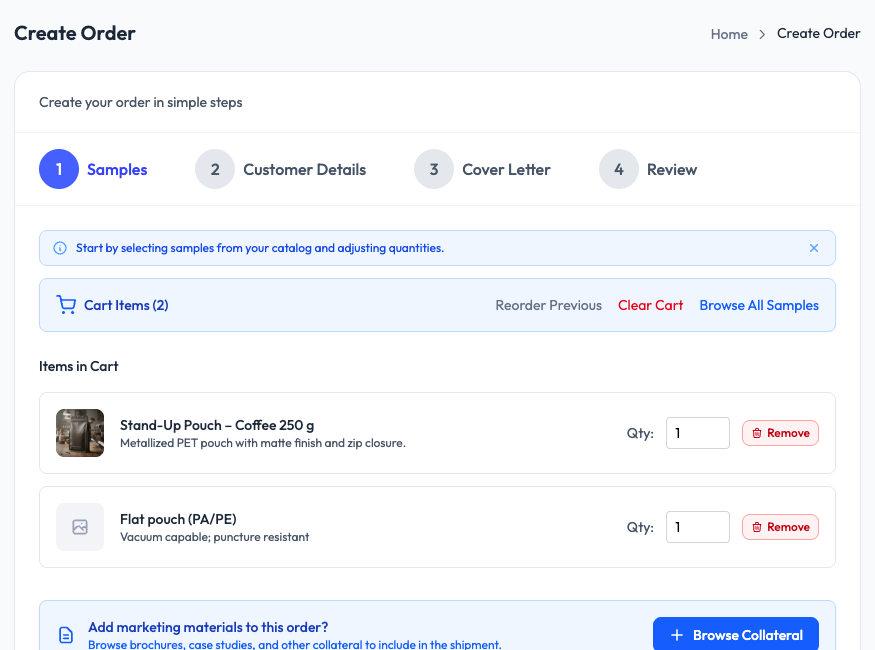
When your cart has the right items, click Continue to Details.
Step 2: Customer Details
Enter the recipient’s information. If your CRM is connected, you can search for existing contacts by name, company, or email. Selecting a CRM contact auto-fills the customer fields.
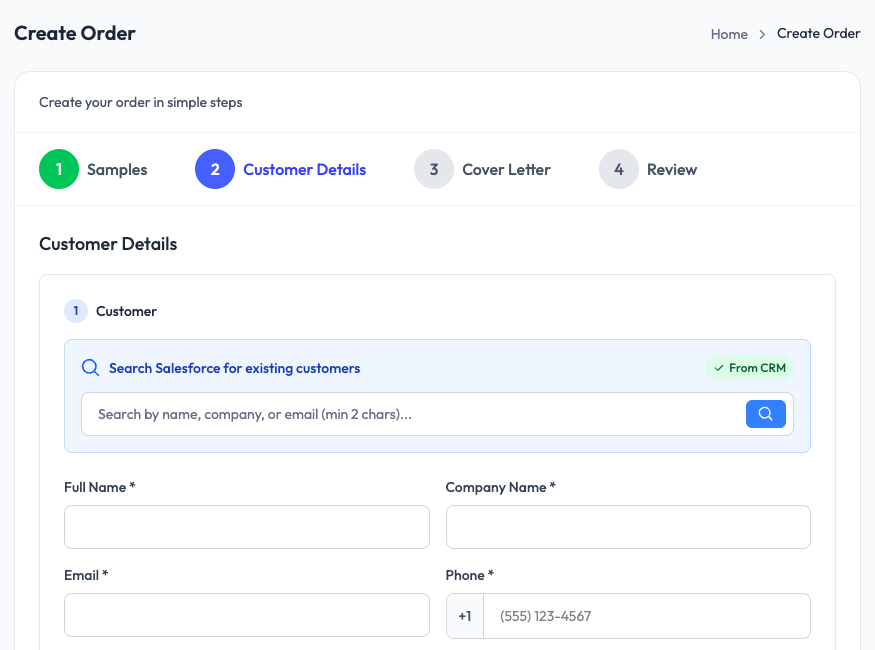
Fill in the required fields: Full Name, Company Name, Email, and Phone. Below these, enter the shipping address. The address field uses Google Places autocomplete to speed up entry and reduce errors.
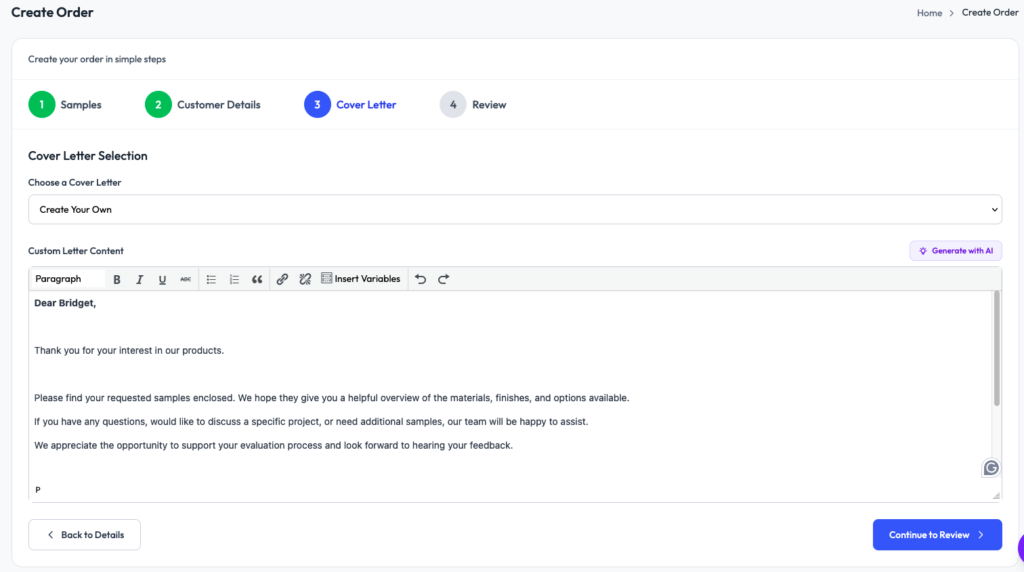
Step 3: Cover Letter
Optionally select a letter template to include a personalized note with the shipment. The letter template uses variable substitution to fill in the recipient name, company, sales rep name, and order details automatically. You can preview the generated letter before continuing. This step is optional. If you do not want to include a letter, skip it and proceed to Review.
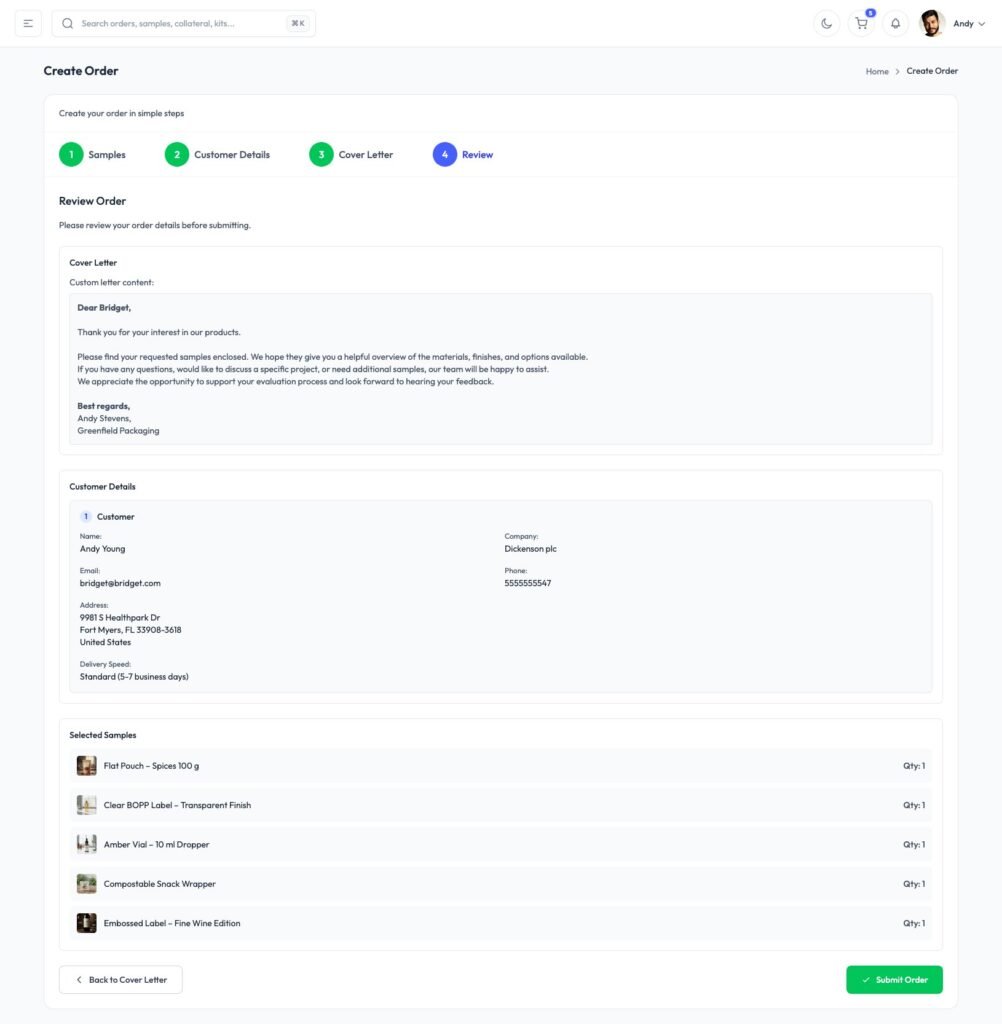
Step 4: Review
Review the complete order: items, quantities, customer details, shipping address, and letter. Everything is displayed on a single summary screen so you can verify before submitting. Click Submit Order when everything looks right. Your fulfillment team will see it in their queue immediately.